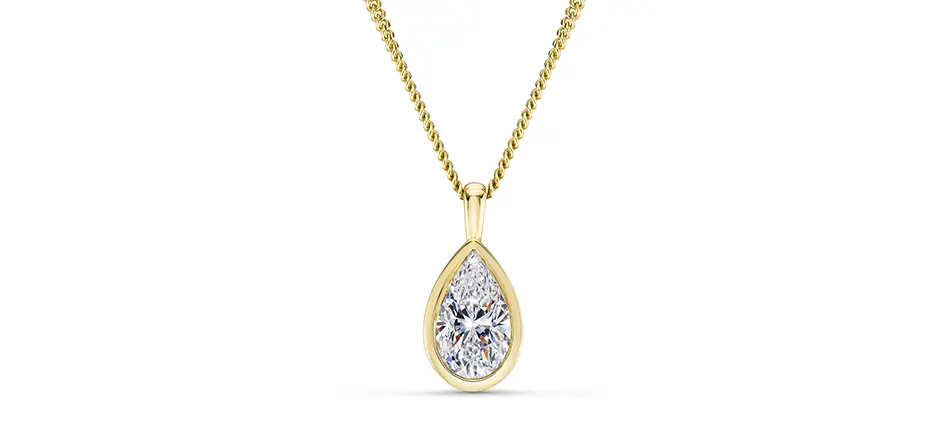
How to Light Reflective Jewellery Without Losing the Metal or the Sparkle
This article is part of our Jewellery Product Photography guide. Here we go deep on the physics and the actual technique behind controlling polished metal and gemstone reflections.
You're Not Lighting the Ring. You're Lighting the Setup.
The law behind every reflective surface is simple and absolute: light leaves at the same angle it arrives, measured from the surface. On polished metal or a gemstone facet, the camera isn't really recording the object's own colour so much as whatever happens to sit at the correct reflection angle — a light panel, a black card, the camera itself, a coloured wall, the photographer. Anything positioned at the right incidence angle relative to a curved facet will appear "in" that facet.
That's why professional jewellery photography is less about aiming a light at the piece and more about building an entire controlled environment around it. You're not lighting just the ring. You're lighting everything the ring could possibly reflect.
Building a Light Tent That Actually Works
A light tent is a translucent enclosure, usually tracing paper rather than ripstop nylon or regular fabric, that surrounds the piece so that every reflection the camera can see is diffuse white or translucent material, not the room. Lights sit outside the tent, aimed at the diffusing walls rather than directly at the object, softening and wrapping light around every curve. Small pieces are often mounted on wax or fishing line so they can be lit and shot from a genuinely enclosed angle, with a front shield — a piece of white foam-core with a lens-sized hole cut into it — stopping the camera and photographer from appearing in the metal themselves.
The Technique Most Guides Skip: Negative Fill
An all-white light tent solves the reflection problem and creates a new one: a polished ring lit from every direction by soft white light has no visible edges. Nothing defines where the curve of the shank turns, or where one plane of a bangle meets the next. The result reads as a melted, edgeless blob rather than jewellery.
The fix is negative fill, sometimes called black flagging or subtractive lighting: deliberately introducing black card or gobos into or around the light tent at calculated points. Rather than adding light, black card pulls it out, creating a crisp dark reflection line exactly where you need one to separate one curved surface from the next. Thin strips of black paper taped inside the tent at strategic points are enough to give a ring visible form and structure that an all-white tent simply can't produce. This is the single most under-explained technique in jewellery lighting — most beginner setups fail not because the light is wrong, but because there's nothing dark in the frame to define an edge.
Metal and Gemstones need different exposures. You Need Both at Once.
This is the central contradiction of jewellery lighting. Polished metal is reflective and needs diffused light, the goal is a smooth, controlled gradient across every curve, shaped with negative fill.
Gemstones behave completely differently. They're refractive rather than reflective, and they need small, intense, pinpoint sources — an LED penlight, a snooted strobe fitted with a tight honeycomb grid, or a scrap of silver foil positioned close to the stone as a kicker — angled precisely so light bounces internally off facets and straight back into the lens. That's what produces "fire," the flash of internal sparkle that separates a lively diamond shot from a dull grey one.
Matte or brushed metal finishes sit in between: they scatter light more like a diffuse surface, tolerate harsher light without hotspots, and don't need the same negative-fill edge control because there's no true mirror surface to define.
In a single shot with both metal and stone, this means running two different lighting qualities at once: one for the metal and one for the the stone — rather than one uniform setup for the whole piece.
Continuous LED or Strobe?
Strobe gives far higher instantaneous output than continuous LED, which matters because jewellery macro work often needs small apertures for depth of field, and strobe achieves that without the heat build-up a continuous source generates close to an enclosed, reflective setup. A modelling light on a strobe lets you preview roughly where a specular highlight will fall before you fire. Continuous LED is easier because what you see is what you get in real time.
How the Setup Changes by Piece Type
- Rings are typically mounted upright on wax, lit with a broad diffused source for the metal and a focused gemstone light plus a silver foil kicker positioned close to the stone specifically to trigger sparkle.
- Necklaces generally need one broad, even softbox running the full length of the piece for consistent metal coverage, plus a separate, more focused light or under-reflector for the pendant if there is one, since a single light rarely covers both a long chain and a denser focal point evenly.
- Earrings are often hung vertically inside a three-sided diffused tunnel, shot straight down the tunnel for symmetry, with dual symmetric side lights for even metal coverage and one focused spot for sparkle on any stones.
The pattern across all three: setup complexity scales with how much of the piece needs even, wraparound coverage versus how much needs one deliberate focal highlight.
Do Polarising Filters Actually Help?
Sometimes, and only for part of the problem. Tested comparisons have found a circular polariser genuinely effective at killing a large diffuser-shaped hotspot reflected on a metal surface. The same polarisation, though, tends to make small gemstones look flat and too dark, killing exactly the sparkle you're separately trying to create with hard pinpoint light. Treat a polariser as a targeted tool for metal glare, not a universal fix you can leave on for the whole shot.
The Mistakes That Produce Obviously Amateur Results
- Direct, undiffused flash on polished metal, producing blown, clipped hotspots with no gradient at all.
- An all-white tent with no negative fill, producing flat satin look, edgeless metal with no sense of form.
- Coloured surroundings — a coloured backdrop, coloured clothing, a coloured wall — reflecting a visible colour cast into supposedly neutral silver or platinum, which compounds the colour-accuracy issues covered in photographing gold jewellery accurately.
- Using one uniform lighting approach for both metal and stone in the same shot, leaving you with either lifeless metal or a stone with no fire, since the two genuinely need opposite qualities of light at the same time.
Get the lighting right and the next problem is holding it identically consistent across dozens of frames if you're focus stacking the same piece — any drift in output between frames shows up as ghosting or colour shifts in the blend.
More in This Guide
- Focus Stacking Jewellery Photography — Getting a whole ring or pendant sharp at macro distances without halos.
- Photographing Gold Jewellery Accurately — Keeping yellow, rose and champagne gold true to life and cutting colour-driven returns.
- Building a Consistent Jewellery Catalogue — Making every SKU in a growing catalogue look like it belongs to the same family.
- ← Back to the full Jewellery Product Photography guide
By M.O. Studios — Birmingham-based jewellery & product photography studio Published 12 August, 2026